
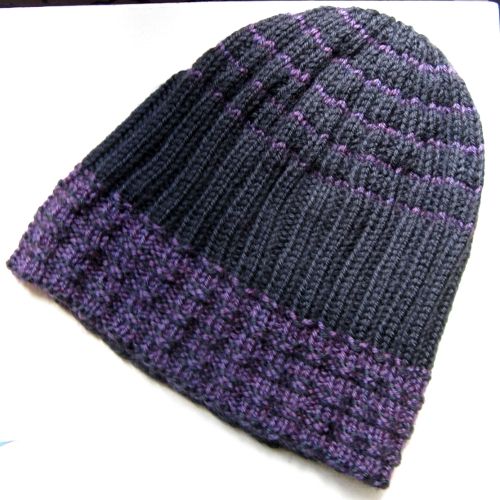
One of the things I've done recently is work up a variation of the Wizarding Incognito Hat that is a standard Muggle toque. It's really very simple and works for any stitch count as long as it's evenly divisible by 8.
hat (with gauntlets), 104st, wool.
A general hat recipe after the jump.
Basic ribbed and cuffed cap:
The general idea is to cast on a multiple of 8st and work in k2p2 ribbing until the piece is the desired length before the decreases. For a toque that pulls down well over the ears with a moderate turned up cuff, I would work 6in long for a small size and 7in long for an adult hat before beginning the decreases. The tighter the hat fits around, the shorter the hat will be when worn, so make sure the hat fits comfortably based on one's gauge. Additionally, if adding frequent stripes as I have done, the ribbing isn't quite as snug. This is more noticeable if the gauge is loose for the yarn.
To achieve the same kind of stripes I did is simple. First, I used a long tail cast-on and I used the crown color as the yarn over my thumb and the cuff color for the yarn over my forefinger. This gives me 2 extra ends to weave in, but it gives a thin border around the cuff that I like very much. Then I join in the round and work the cuff color 4r for every 1r of contrast. Once the cuff is deep enough, I then switch to the crown color and work it either in a solid color or add in stripes as desired.
I like to use the slip stitch method of jogless jogs, which moves the first stitch over 1 every time the color is changed. I also like to carry the main color of the cuff or the body of the hat up, but break and weave in the ends for the one row stripes.
Every time the color changes, that row should be knit if one wants a sharp color transition. This means that the first (and in some cases only) CC row is knit and the first MC row after a CC row is also knit. For 1r stripes as I have done, this leads to 2r in sequence that are all knit, which is why the ribbing doesn't fit as snugly. Once the new color is established, it goes back to k2p2 ribbing. In my case, I worked one CC row to 4 MC rows so that the ribbing would keep some of its spring.
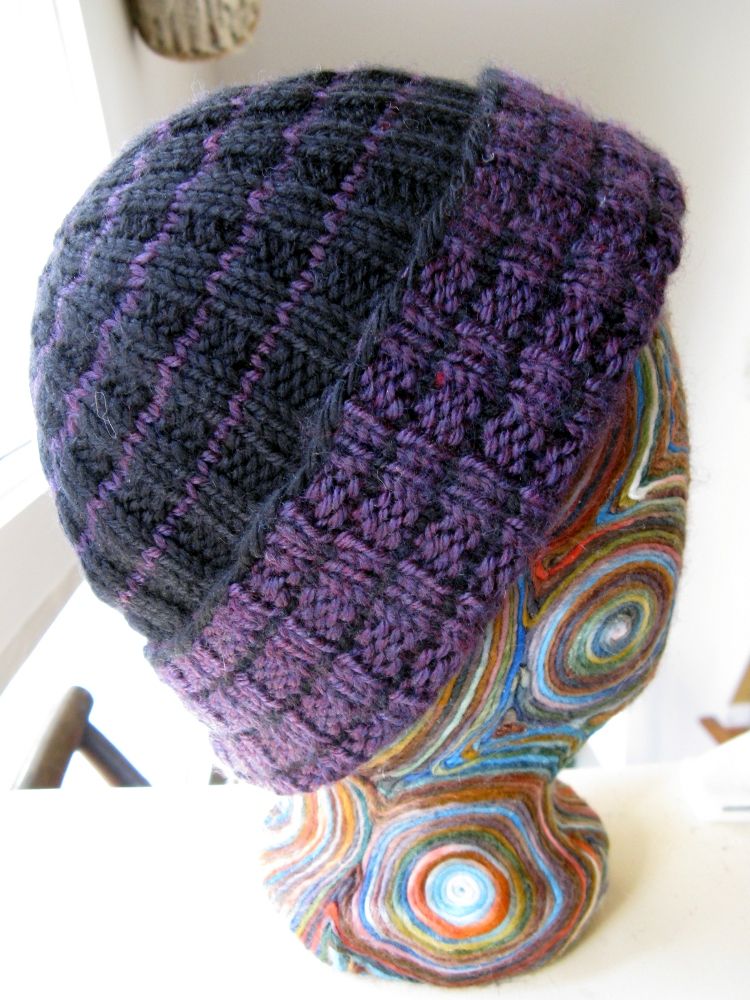
Keep in mind that the "wrong" side of the cuff is facing the outside of the hat when it isn't folded up. I don't mind purling and adjusting my ltco so the correct side faces out, so I sometimes work the cuff from the wrong side, but there's an easy cheat for this since k2p2 ribbing is reversible except where there are color changes. Work the cuff rightside out, changing colors as desired and leaving the ends to the back. Do this all the way through the cuff. For the first color change that would show on the outside of the hat when the cuff is folded up, push the hat inside out and bring the working yarn to the back. Slip the first stitch so that it becomes the last stitch of the round, and then join in the new color for the stripe. The inside is now the outside and the hat can be completed rightside out.

Inside out and rightside out.
The decreases are worked:
- p2tog every other purl pair; work 3r (or about half an inch).
- p2tog the remaining purl pairs; work 3r.
- k2tog every other knit pair; work 3r.
- k2tog the remaining knit pairs; work 3r. The entire piece should now be k1p1 ribbing, the remaining decreases should be worked to maintain k1p1 ribbing.
- (dec in pattern 2x, work 4) to end; work 3r.
- (work 2, dec in pattern 2x) to end; work 1r.
- dec in pattern to end; pull yarn through the stitches and secure.
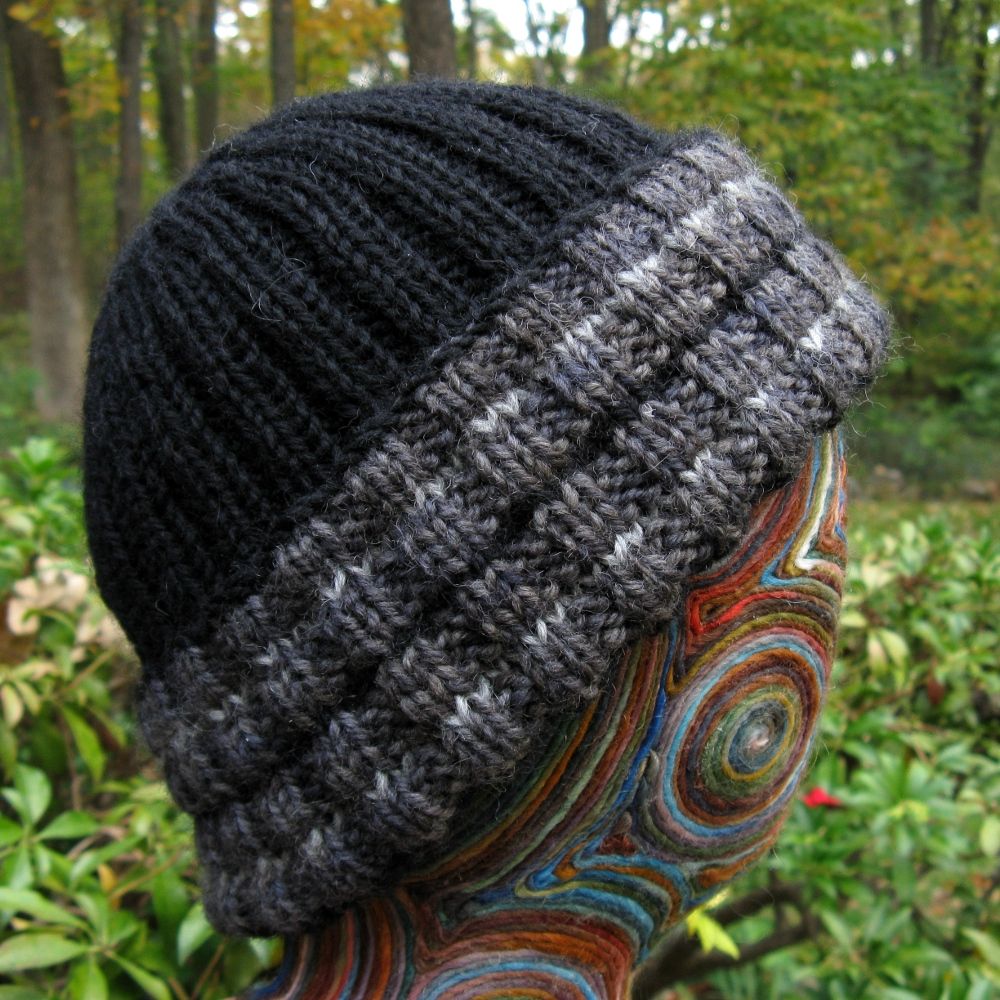
Old Grandad, 112st, acrylic. Steam blocked on a mannequin head to relax the ribbing.

No comments:
Post a Comment