
Next, I wanted to talk about two things today. The first is my latest knitting project and the second is trying to take product photographs when the light doesn't comply.
So, knitting. I got itchy fingers and decided to try a technique that has intrigued me for lo these many moons. Helical knitting, or spiral knitting for single row stripes. There's a short description here at Grumperina's blog.
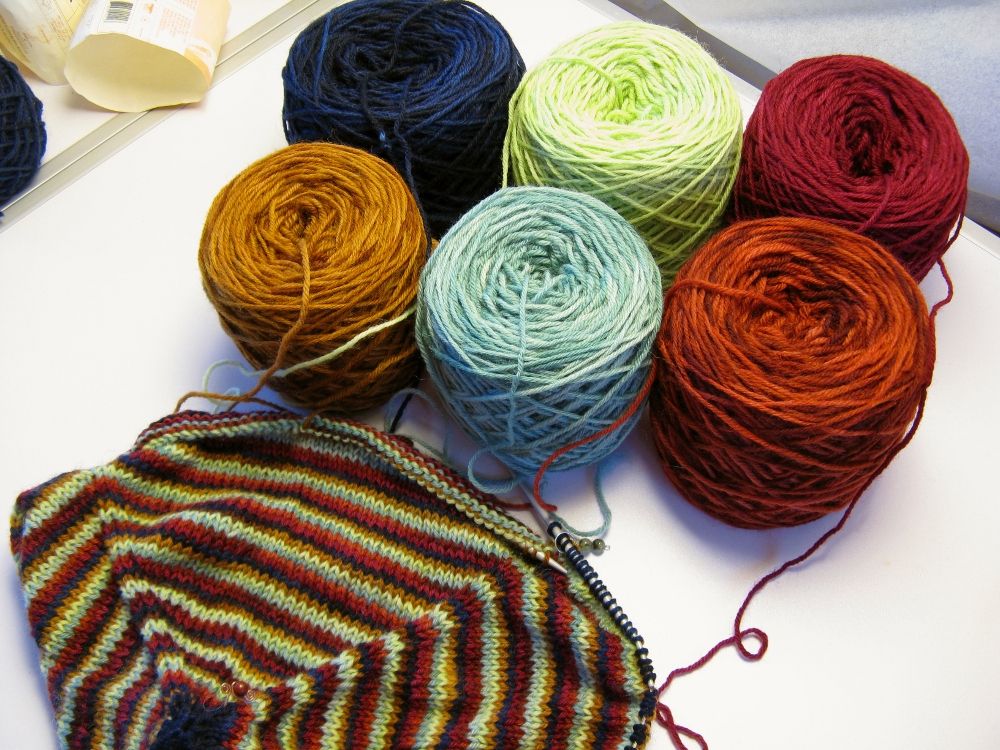
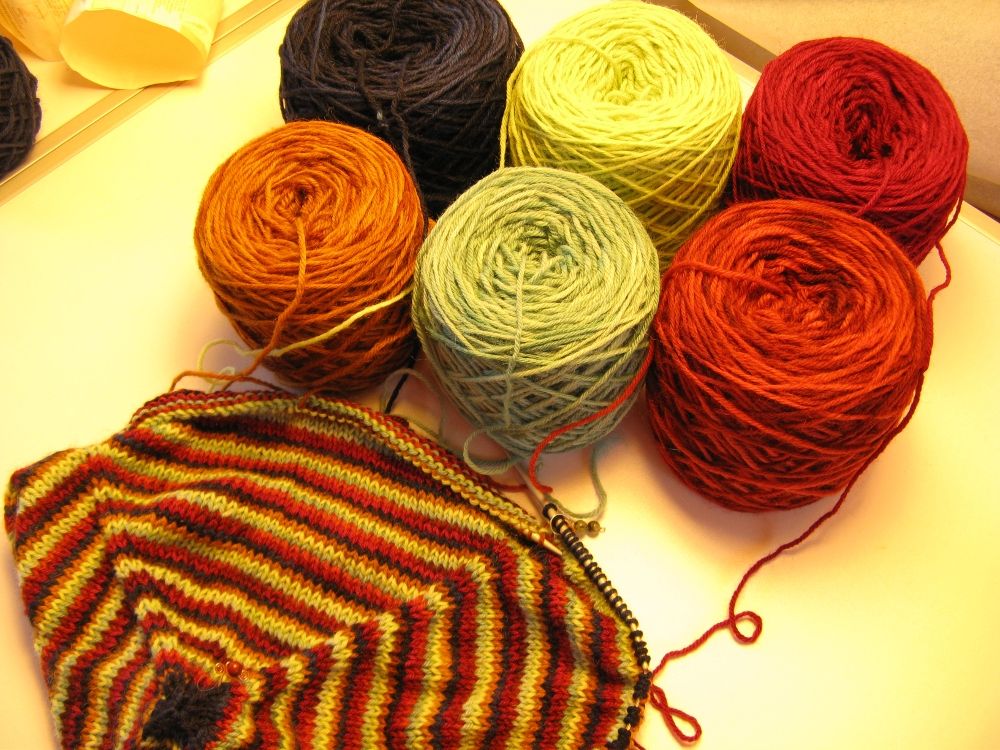
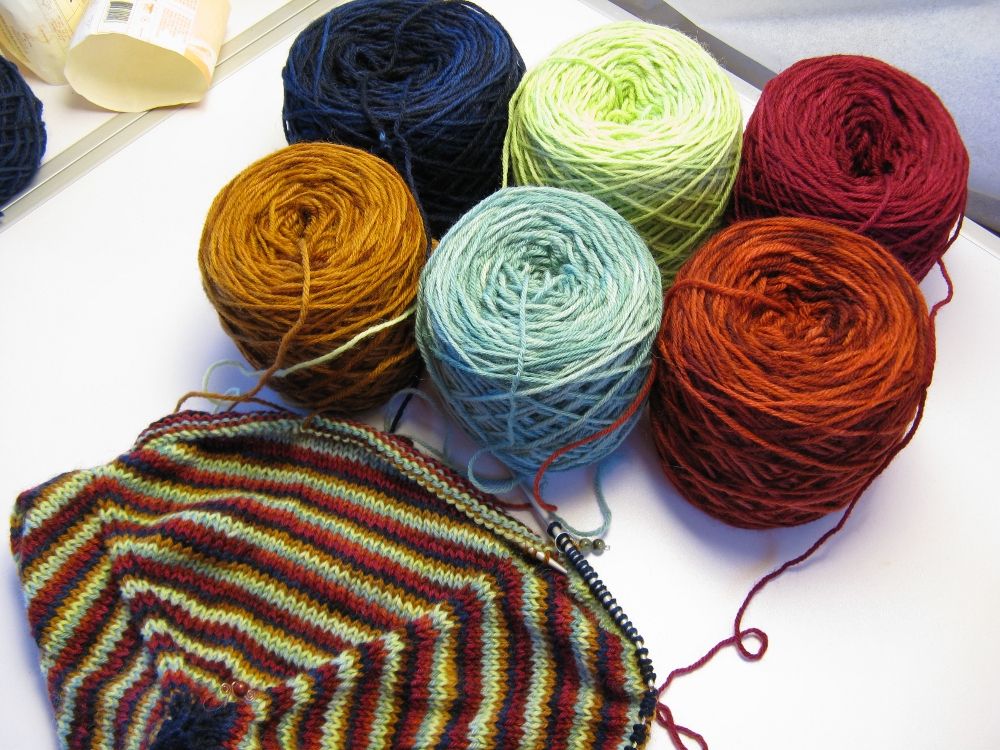
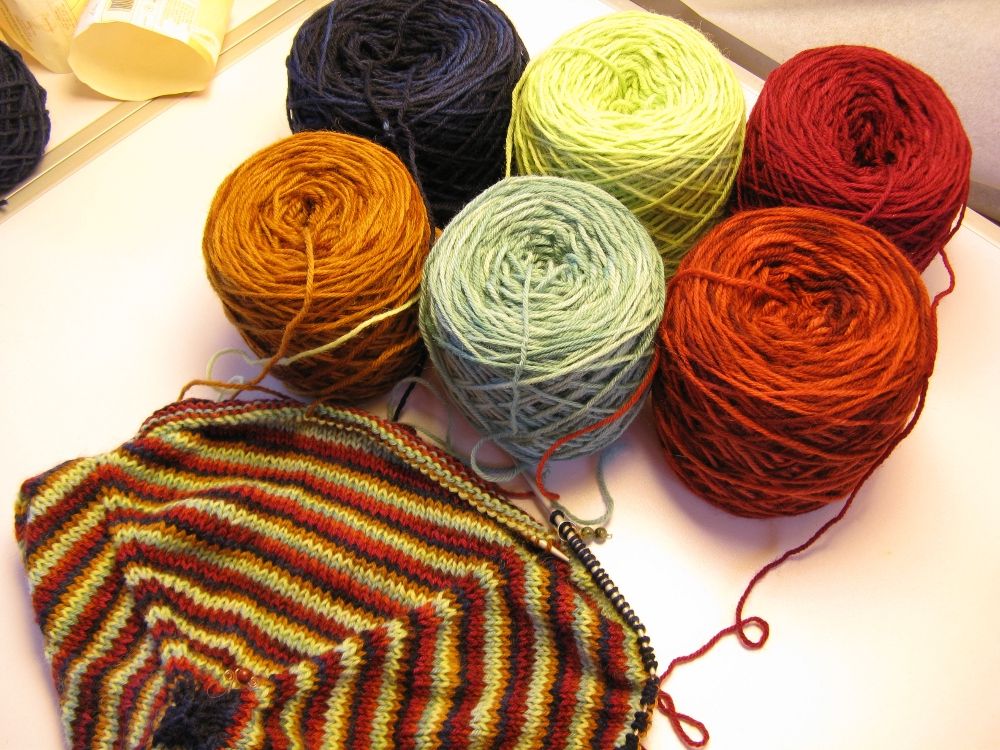
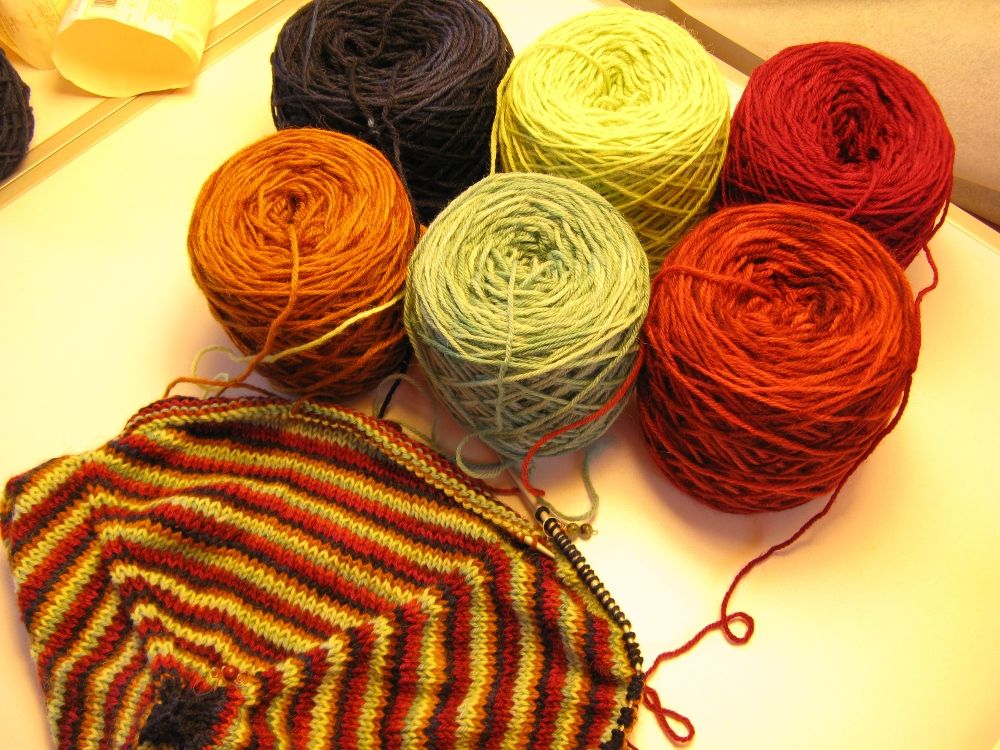
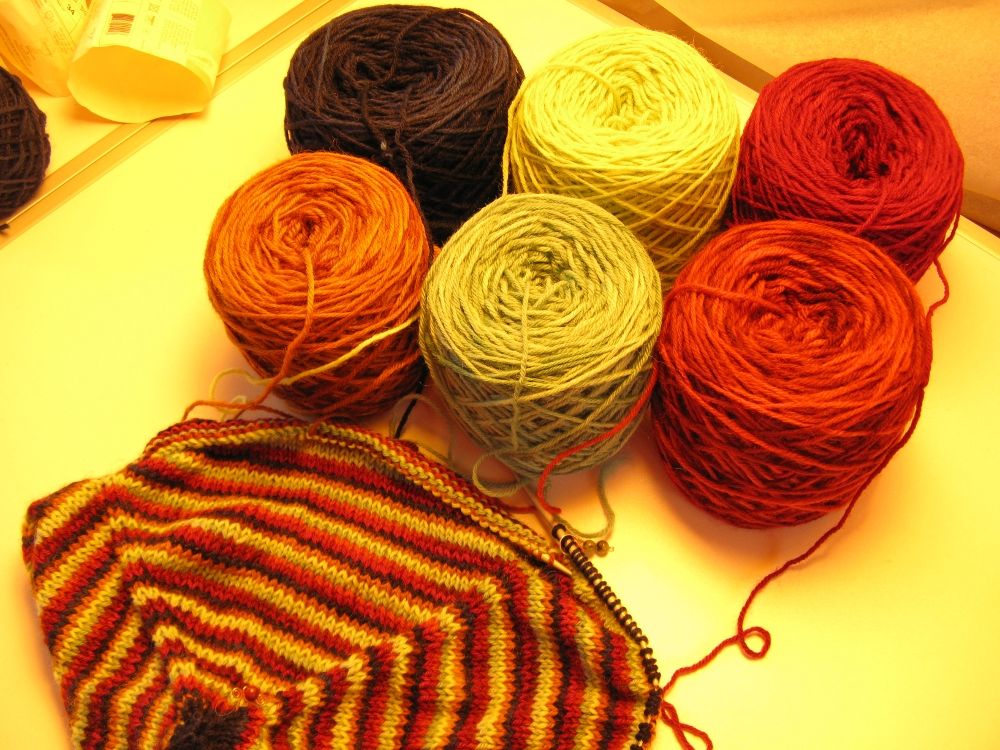
The idea is that since knitting in the round is actually a spiral, it should be possible to stack those spirals for single row stripes that positively do not jog. And it works. It doesn't even have to be just two colors, it can be as many as one likes. So, I decided to try with 6. I dove into my stash last night and picked out 6 skeins of yarn that seemed like they would combine well, if unconventionally, and set to work. Helices (Rav project page)
Lots and lots more pictures and blather after the jump.

Since my stash is mighty, I'm using 6 skeins of Araucania Nature Wool for the main piece, and I have 40g extra of the dark blue to finish it off.
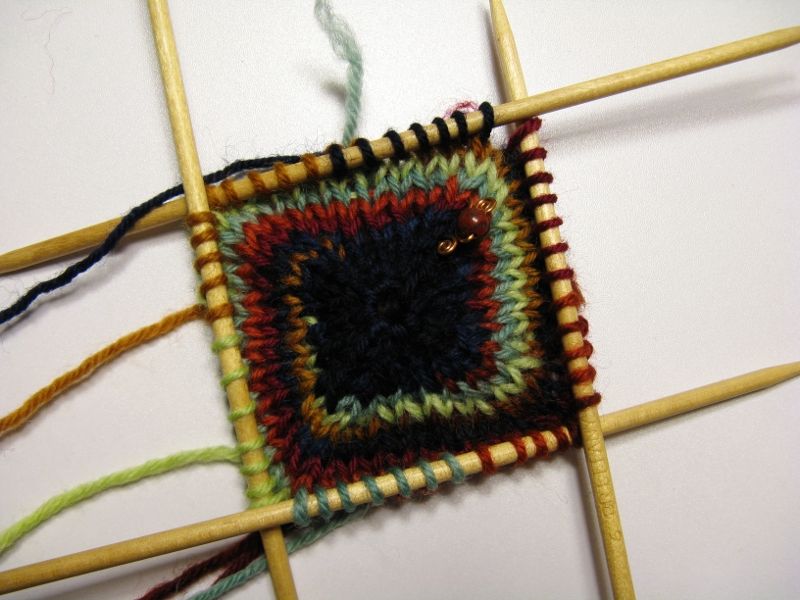
I decided to work a few rows and increases with the dark blue rather than begin the spiral right away because it's a bit like wrestling a limp octopus joining in all those colors and it is easier to work when there are more stitches to hold them all and the needles in place. Working to 24st also allowed me to start each color with 4st, which pleases my sense of symmetry.
The start of the row, the increases to keep this piece a square, and the color changes are always in the same place. The only thing that changes is that each color advances a set of stitches each round. It's almost a game of leap frog, but instead of jumping ahead of the previous color one is simply over-lapping it. So, what is blue this row becomes burgundy the next row, etc. Because of this, the stripe progression goes in reverse of the order in which the colors were added.
It's very easy to work, and even easier after I switched to a circular needle. All that yarn kept getting hung up on the dpn points.
It's not hard to remember when to change color. When you reach the last stitch of a color section, pick up the previous color that's right below it and continue on through the next color section. My tension is discernibly tighter at the transition points because I decided I preferred it tight to loose. But I didn't want the last stitch of each section to disappear by being too tight on its own. So I tighten up the loose stitch and work the first stitch of the new color. Then after a few more stitches I tug on the color I just dropped. That stretches the stitch below it so it is normal in size, taking up a little length from the stitch before and after it.
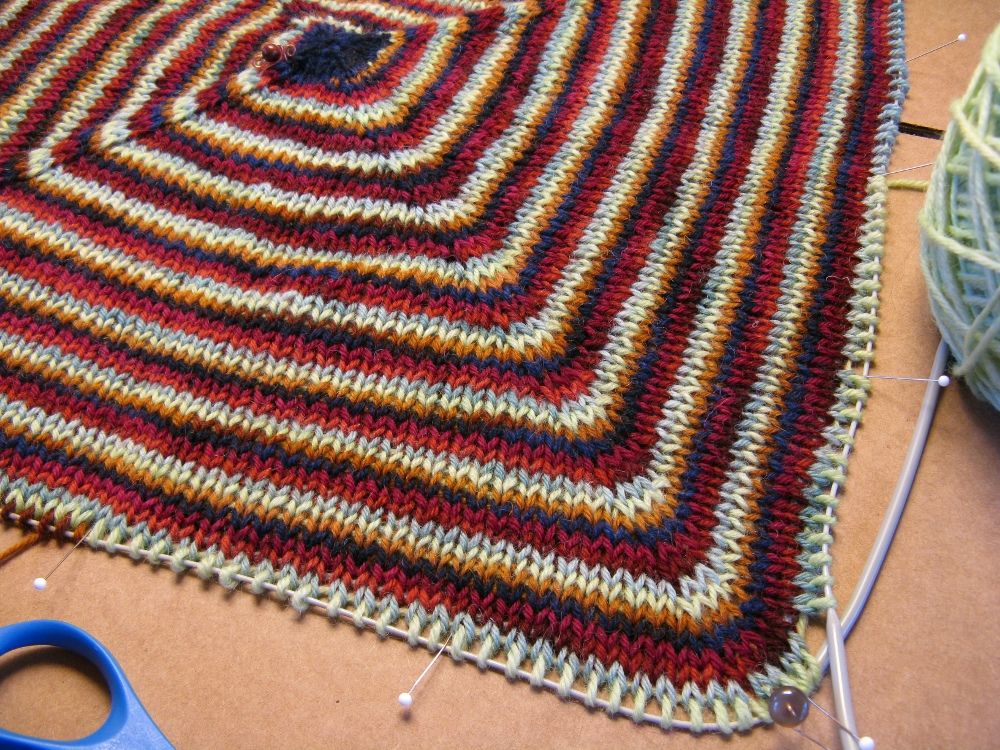
The tension change is particularly visible here, and since the color changes always occur on the same columns of stitches, it forms a clear line. I don't really mind, however. Over time it will equalize itself and I prefer the neat tighter stitches to irregular loose ones that stick out like a sore thumb.
Meanwhile, I chose to work a very simple yarn over increase, twisting it on the following row to close it up. That preserves the striping the best as it doesn't carry up the previous row's color at all. If I had been paying more attention, I would have twisted them in opposite directions on either side of the increase selvedge, but I was more interested in watching the spiral develop.
I do think that this particular combination looks best as a smaller square. The bigger it gets, the more dizzyingly stripey it gets. I will be finishing this to the maximum size my yarn allows, however. These colors were never not going to be gaudy! And at least it's a square. Just imagine how hypnotizing a round blanket would have been.
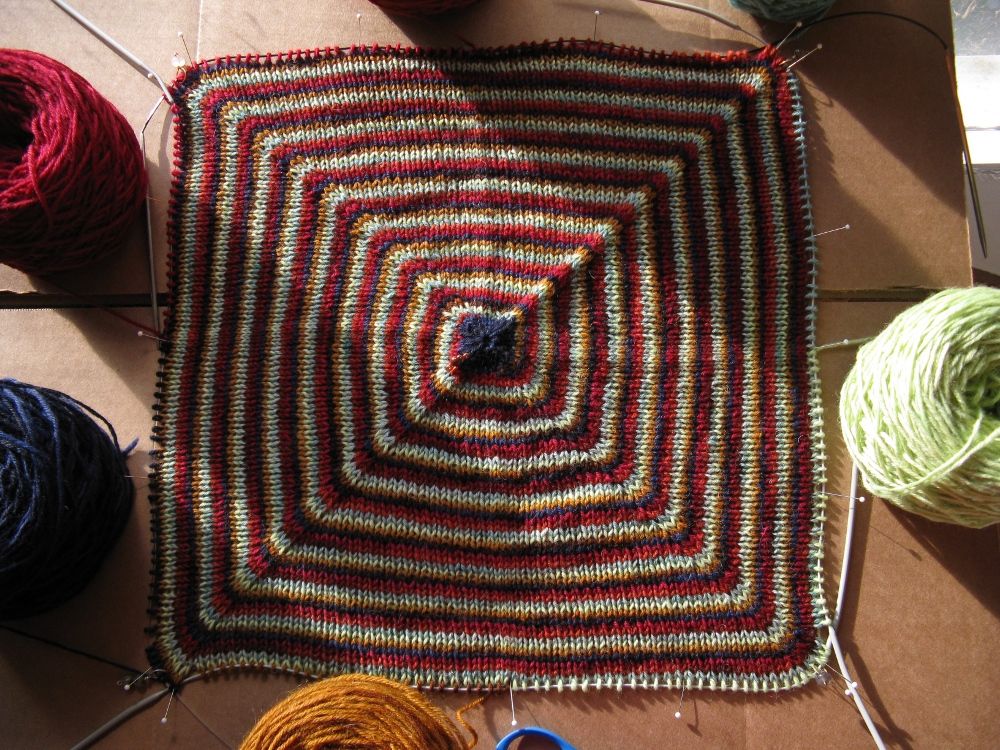
(Get a load of my ghetto cork board, a handy cardboard box. It's only on all those needles for picture taking purposes; I'm only using one to knit with.)
I might try this again some time in shades of grey or some other tonal combination. This technique can also mimic any number of self striping yarns, although stripe height wouldn't change with row length. The fun with this is that any number of colors can be worked, there's no limit beyond one's own patience. Want a thicker strip of a given color? Work more than one strand/section of that color to make it thicker. The yarns do get twisted up with one rotation per round, but unlike working intarsia it's a simple spiral that can be undone by dangling the work and letting it unspin. And as the piece gets bigger, that gets less and less frequent.
Meanwhile, the other thing I've been doing is trying to figure out a way to take product photographs indoors when the light is either the wrong color, at the wrong angle, or too dim. I have two strong CFLs that I use outside at night, but they mimic incandescent bulbs so they're a bit too yellow. I decided that they might be enough to supplement winter sunlight, however. So I set them up last night and I did a test this afternoon. Today has had intermittent clouds, but otherwise was reasonably bright. These are all based on the automatic "manual" settings on my camera. They're a little over-exposed but what I'm looking for is color quality.


top row: automatic white balance; daylight; cloudy; tungsten
bottom row: fluorescent; flourescentH; underwater; and evaluative.
The problem is that automatic is too warm and yellow, while tungsten is too cool. Tungsten is by far the closest to actual color, however, so I usually go with that and tweak it gently in Gimp to warm it up just a fraction.
The other thing I haven't managed to get around, however, is how the pictures and color lack depth. With sunlight, even indirect sunlight, the pictures are much more tasty. There's something missing in these shots and I'm not quite sure what it is. Adding a bit of white tissue paper between the lights and the subject to act as a diffuser improved it a little bit as I think the lights were flattening everything out, but it's still not like natural sunlight. All my indirect sunlight pictures are coming out far too blue, however. So much so that I can't correct them well enough to use. And compare this full sun picture with this supplemented light picture which reveals again the shortcomings of the tungsten setting, far too pink in this case. The light lime green is completely dulled down.

So, there is no easy solution and I'm going to have to continue to putz around with lights and angles and hope that I can manage to get some usable yarn pictures for the shop. I have well over 100 items to photograph, and the light hasn't been cooperating. Although, if it takes long enough, the days will get longer and I'll be able to use bright shade again!

No comments:
Post a Comment